Add New vCenters, VM Templates and Networks
vOneCloud can manage an unlimited number of vCenters. Each vCenter is going to be represented by an vOneCloud host, which in turn abstracts all the ESX hosts managed by that particular instance of vCenter.
The suggested usage is to build vOneCloud templates for each VM Template in each vCenter. The built in scheduler in vOneCloud will decide which vCenter has the VM Template needed to launch the VM.
The mechanism to add a new vCenter is exactly the same as the one used to import the first one into vOneCloud. It can be performed graphically from the vCenter View:
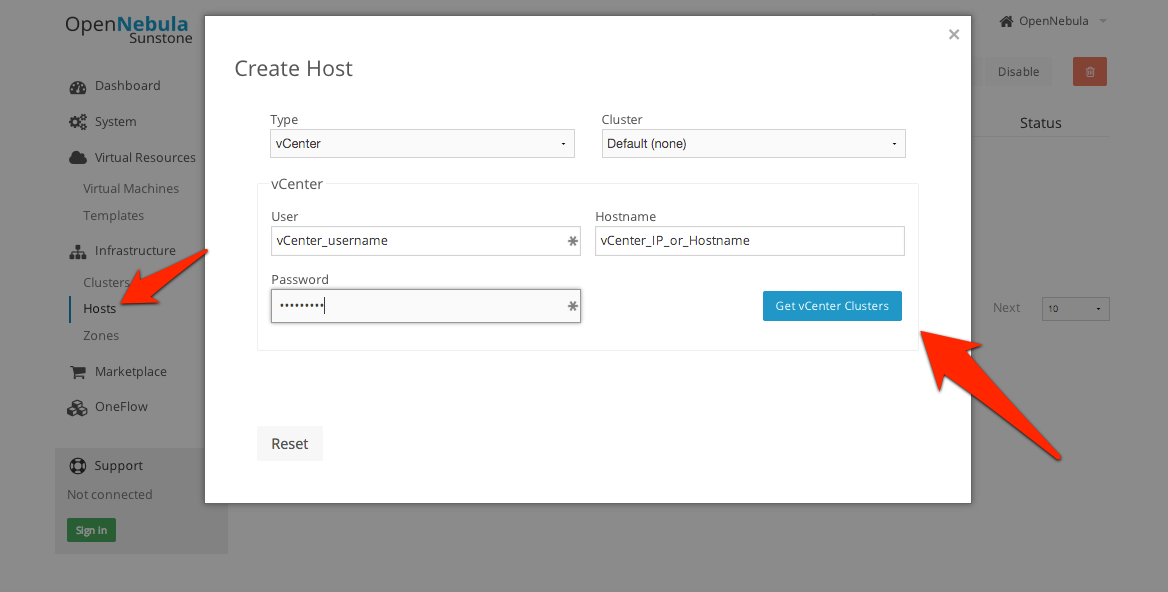
Note
vOneCloud will create a special key at boot time and save it in /var/lib/one/.one/one_key. This key will be used as a private key to encrypt and decrypt all the passwords for all the vCenters that vOneCloud can access. Thus, the password shown in the vOneCloud host representing the vCenter is the original password encrypted with this special key.
To create a new vOneCloud VM Template, let’s see an example:
Firsts things first, to avoid misunderstandings, there are two VM templates we will refer to: the vOneCloud VM Templates and the vCenter VM Templates. The formers are created in the vOneCloud web interface (Sunstone), whereas the latters are created directly through the vCenter Web Client.
A cloud administrator builds two vOneCloud templates to represent one vCenter VM Template avaiable in vCenterA and another available in vCenterB. As previous work, the cloud administrator creates two vCenter VM templates, one in each vCenter.
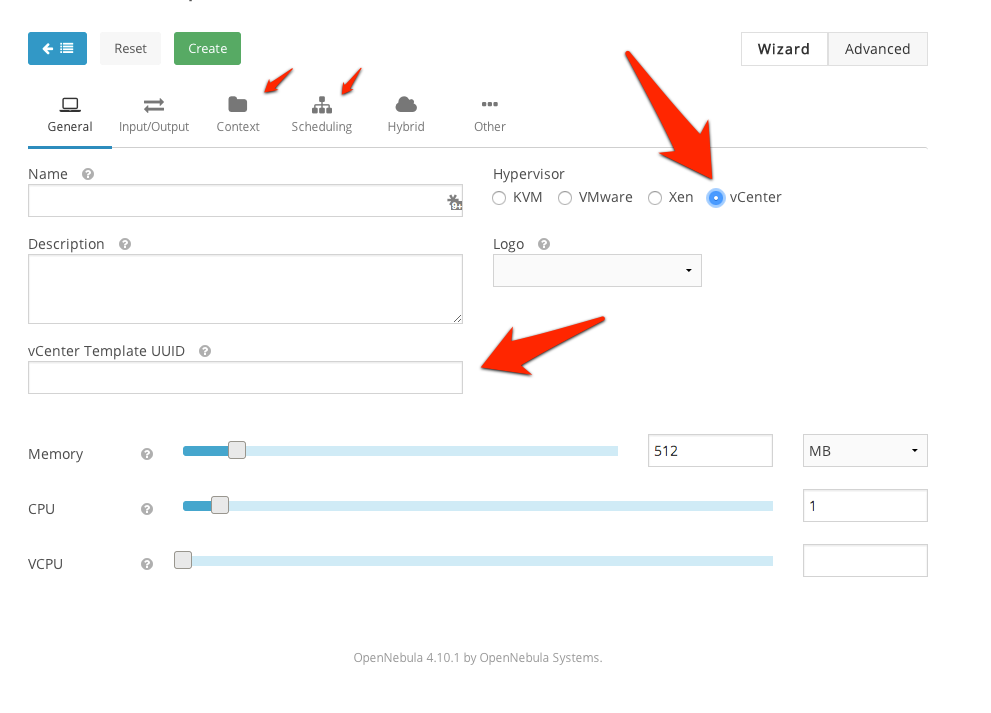
To create a vOneCloud VM Template representing a vCloud VM Template, log in into Sunstone as vOneCloud user as in explained here, proceed to the Virtual Resources -> Templates, and click on the + sign. Select vCenter as the hypervisor, and type in the vCenter Template UUID. You can also set a capacity (CPU and Memory) that would be honored at the time of instantiating the VM. In the Scheduling tab you can select the hostname of the specific vCenter. The Context tab allows to pass information onto the VM to tailor it for its final use (read more about it here). In Network tab a valid Virtual Network (see below) can added to the VM, possible values for the MODEL type of the network card are:
- virtuale1000
- virtuale1000e
- virtualpcnet32
- virtualsriovethernetcard
- virtualvmxnetm
- virtualvmxnet2
- virtualvmxnet3
Fill in with UUID uuidA in and select host vCenterA. Repeat for vCenterB.
If a user instantiates one of these templates, the vOneCloud scheduler will pick the right vCenter in which to instantiate the VM Template.
Using the automated process for importing vCenter infrastructures, vOneCloud will generate the above template for you at the time of importing vCenterA.
vCenter Networks/Distributed vSwitches and running VMs for a particular vCenter cluster can be imported in vOneCloud after the cluster is imported using the same procedure to import the vCenter cluster, making use of the Infrastructure --> Hosts tab in the vCenter View.
A representation of a vCenter Network or Distributed vSwitch in vOneCloud can be created in vOneCloud by creating a Virtual Network and setting the BRIDGE property to exactly the same name as the vCenter Network. Leave “Default” network model if you don’t need to define VLANs for htis network, otherwise chose the “VMware” network model.
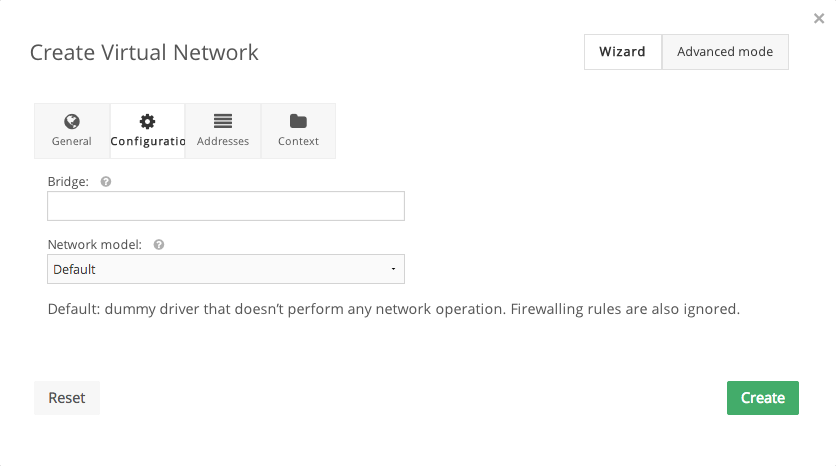
Several different Address Ranges can be added as well in the Virtual Network creation and/or Update dialog, pretty much in the same way as it can be done at the time of acquiring the resources explained in the Import vCenter guide.
Read more about the vCenter drivers.